GKWS (Message Wall | contribs) (→Recollection Rate: Organised info for easier reading.) Tag: Visual edit |
GKWS (Message Wall | contribs) (Removed partners that do not have drastically different gauges to reduce clutter. Please leave their skill in their respective partner pages instead.) Tag: Visual edit |
||
| (31 intermediate revisions by 9 users not shown) | |||
| Line 1: | Line 1: | ||
| − | This article describes |
+ | This article describes various gameplay elements in Arcaea. |
==Song Selection== |
==Song Selection== |
||
| Line 11: | Line 11: | ||
* The song list at the right can be scrolled by sliding it up or down. |
* The song list at the right can be scrolled by sliding it up or down. |
||
| − | *The songs can be sorted by |
+ | *The songs can be sorted by Title, Grade, Clear (highest to lowest submitted score), Date (when the song was added to the game), and Difficulty. |
*The song pack list can be accessed by selecting the current pack at the top-middle of the screen. |
*The song pack list can be accessed by selecting the current pack at the top-middle of the screen. |
||
*A list of songs from all packs can be accessed by entering the pack list and selecting the "All Songs" button on the bottom. |
*A list of songs from all packs can be accessed by entering the pack list and selecting the "All Songs" button on the bottom. |
||
| ⚫ | |||
*The "RANDOM" button at the end of the song list directs to a random song without selecting it to play. |
*The "RANDOM" button at the end of the song list directs to a random song without selecting it to play. |
||
| ⚫ | |||
== Play Screen == |
== Play Screen == |
||
| Line 23: | Line 23: | ||
**Song progress |
**Song progress |
||
**Song information |
**Song information |
||
| − | **Indicators for Full Recall and Pure Memory respectively. |
||
| − | ***The Full Recall indicator is a purple dot. |
||
| − | ***The Pure Memory indicator is a blue dot. |
||
*'''Track''': The vertical plane comprising of the 4 lanes. |
*'''Track''': The vertical plane comprising of the 4 lanes. |
||
*'''Floor Input''': The solid purple horizontal line, spanning the track near the bottom, is the lower bound for notes. |
*'''Floor Input''': The solid purple horizontal line, spanning the track near the bottom, is the lower bound for notes. |
||
*'''Sky Input''': The striped horizontal line, cutting across the middle of the screen, is the upper bound for notes. |
*'''Sky Input''': The striped horizontal line, cutting across the middle of the screen, is the upper bound for notes. |
||
| + | *'''Combo: '''Found under the sky input, it shows how many notes you have hit successfully, be it Pure or Far. A miss will break the combo. |
||
| − | * |
+ | *'''Recollection Gauge''': The vertical bar at the top-left of the screen, of which there are various types. |
| + | |||
| + | * '''FR/PM Indicators: '''Two adjacent dots; a purple one indicating [[Scoring#Titles|Full Recall]] status and a blue one indicating [[Scoring#Titles|Pure Memory]] status. These can be relocated or disabled under "Settings > Visual > FR/PM Indicator". |
||
| + | ** Top: Indicators are displayed on the Information Pane, under the song's cover art. |
||
| + | ** Combo: Indicators are displayed under the combo value. |
||
| + | ** Disabled:''' '''Indicators are not displayed. |
||
=== Note Types === |
=== Note Types === |
||
| Line 48: | Line 51: | ||
* These notes appear on the bottom. |
* These notes appear on the bottom. |
||
* They require you to keep your finger held on the same spot until it ends. |
* They require you to keep your finger held on the same spot until it ends. |
||
| − | * There is no FAR timing for these notes. |
+ | * There is no FAR & PURE EARLY/LATE timing for these notes. |
* You can hit these notes in the middle if you miss the beginning. |
* You can hit these notes in the middle if you miss the beginning. |
||
* If your finger is released before the note ends, there is a short time window to place it back without incurring a LOST. |
* If your finger is released before the note ends, there is a short time window to place it back without incurring a LOST. |
||
| Line 56: | Line 59: | ||
| |
| |
||
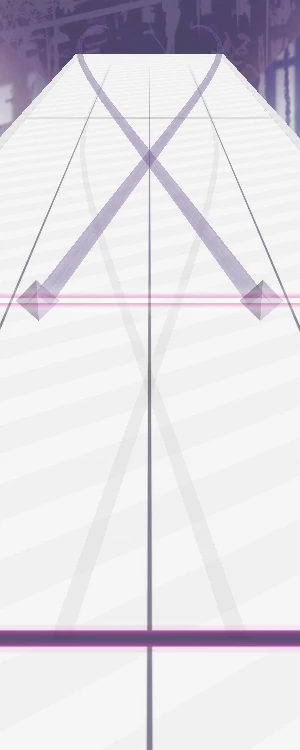
* These notes are thick, curving lines that appear above the track. |
* These notes are thick, curving lines that appear above the track. |
||
| − | * Drag your |
+ | * Drag your finger along them as they move. |
* In Past difficulty, they will only appear along the sky input and can only go left or right. |
* In Past difficulty, they will only appear along the sky input and can only go left or right. |
||
* In Present and Future difficulties, they can appear anywhere within the input region and can go in any direction. |
* In Present and Future difficulties, they can appear anywhere within the input region and can go in any direction. |
||
* In Present difficulty, if there is an upcoming arc note that goes downwards, you will be forewarned via an icon on the corner of the screen. |
* In Present difficulty, if there is an upcoming arc note that goes downwards, you will be forewarned via an icon on the corner of the screen. |
||
| − | + | * There are blue and purple arc notes, which should be assigned to one hand each. If you attempt to switch fingers in the middle of an arc note, it will turn red and the combo ends. |
|
| + | ** In [[Red and Blue and Green]], there is also a Green arc. |
||
| − | * |
+ | * There's also no timing for when you hit the note, so you can actually hold your finger there beforehand and still get PURE timing. |
| ⚫ | |||
| + | ** This feature allows multiple short Arcs joining toghether to act like "Catch" notes. |
||
| ⚫ | |||
| ⚫ | |||
| ⚫ | |||
| ⚫ | |||
| ⚫ | |||
| ⚫ | |||
| ⚫ | |||
|[[File:Arc Note.jpg|thumb|50px]] |
|[[File:Arc Note.jpg|thumb|50px]] |
||
|- |
|- |
||
| Line 72: | Line 77: | ||
* These notes appear above the track. |
* These notes appear above the track. |
||
* They only appear on Present and Future difficulties. |
* They only appear on Present and Future difficulties. |
||
| − | * They typically appear on traces (see below), but there are exceptions (e.g. [[DX Choseinou Full Metal Shojo]]). |
||
* When a sky note and a floor note appear at the same time, there is a line connecting the two notes: |
* When a sky note and a floor note appear at the same time, there is a line connecting the two notes: |
||
** This was first introduced in 1.0.10, but it could be disabled. |
** This was first introduced in 1.0.10, but it could be disabled. |
||
| Line 84: | Line 88: | ||
* Holding them does not award any bonus. |
* Holding them does not award any bonus. |
||
* Sky notes typically appear on or at the end of traces. |
* Sky notes typically appear on or at the end of traces. |
||
| − | * They only appear on Present and Future difficulties |
+ | * They only appear on Present and Future difficulties. |
| − | * In the game's tutorial, they are described to only appear after arc notes. However, this is not always true |
+ | * In the game's tutorial, they are described to only appear after arc notes. However, this is not always true. |
|[[File:Trace.jpg|thumb|50px]] |
|[[File:Trace.jpg|thumb|50px]] |
||
|} |
|} |
||
== Recollection Rate == |
== Recollection Rate == |
||
| − | Recollection Rate is a percentage which represents the player performance at the current time during gameplay. It is displayed on the left side of the screen on a meter known as the Recollection Gauge (or simply Gauge). |
+ | Recollection Rate is a percentage which represents the player performance at the current time during gameplay. It is displayed on the left side of the screen on a meter known as the Recollection Gauge (or simply Gauge). The gauge fills slightly with every note hit, and depletes slightly with every note lost. |
There are several different types of gauge that depend on which partner you choose that behave differently: |
There are several different types of gauge that depend on which partner you choose that behave differently: |
||
| − | + | === Normal === |
|
*The gauge enabled by default. |
*The gauge enabled by default. |
||
| − | * |
+ | *Default properties: |
| − | **Initial Rate: 0 |
+ | **Initial Rate: 0 |
| ⚫ | |||
| − | **[[Scoring#Timing|LOST]] Penalty: 2 |
+ | **[[Scoring#Timing|LOST Note]] Penalty: 2 |
**[[Scoring#Titles|Track Complete]] properties: |
**[[Scoring#Titles|Track Complete]] properties: |
||
| − | ***Requirement: ≥ 70 |
+ | ***Requirement: ≥ 70 |
***Icon Colour: Purple. |
***Icon Colour: Purple. |
||
***Adds to cleared song count in profile card. |
***Adds to cleared song count in profile card. |
||
***Fulfills song unlock requirements. |
***Fulfills song unlock requirements. |
||
| − | **Gauge Colour: Purple (< 70 |
+ | **Gauge Colour: Purple (< 70). Purple & sky blue (≥ 70). |
*Losing consecutive notes incurs a greater penalty. |
*Losing consecutive notes incurs a greater penalty. |
||
*Each note hit increases the rate by a different amount, depending on the number of notes in the song chart. |
*Each note hit increases the rate by a different amount, depending on the number of notes in the song chart. |
||
| − | *With [[Hikari (Zero)]] |
+ | *With [[Hikari (Zero)]]: |
| − | **Losing a note depletes the whole gauge to 0 |
+ | **Losing a note depletes the whole gauge to 0. |
| − | **The |
+ | **The Recollection Rate fades in and out during gameplay. |
| − | |||
* Sealing a partner with a gauge-altering skill [[Partners#Effects|effect]], including Hikari (Zero), reverts the gauge to a Normal one. |
* Sealing a partner with a gauge-altering skill [[Partners#Effects|effect]], including Hikari (Zero), reverts the gauge to a Normal one. |
||
| + | |||
| − | '''Easy''' |
||
| + | === Easy === |
||
* Enabled when selecting a partner with the EASY skill effect. |
* Enabled when selecting a partner with the EASY skill effect. |
||
| − | * |
+ | * Default properties: |
| − | ** Initial Rate: 0 |
+ | ** Initial Rate: 0 |
| + | **Maximum Rate: 100 |
||
| − | ** LOST Penalty: 1.5 |
+ | ** LOST Note Penalty: 1.5 |
** Track Complete properties: |
** Track Complete properties: |
||
| − | *** Requirement: ≥ 70 |
+ | *** Requirement: ≥ 70 |
*** Icon Colour: Green. |
*** Icon Colour: Green. |
||
*** Does not add to cleared song count in profile card. |
*** Does not add to cleared song count in profile card. |
||
*** Fulfills song unlock requirements. |
*** Fulfills song unlock requirements. |
||
| − | ** Gauge Colour: Cyan (< 70 |
+ | ** Gauge Colour: Cyan (< 70). Cyan & green (≥ 70). |
* The penalty for losing consecutive notes is reduced. |
* The penalty for losing consecutive notes is reduced. |
||
| − | '''Hard''' |
||
| ⚫ | |||
| ⚫ | |||
| + | === Hard === |
||
| ⚫ | |||
| ⚫ | |||
| ⚫ | |||
| ⚫ | |||
| ⚫ | |||
| ⚫ | |||
| + | ** Initial Rate: 100 |
||
| + | **Maximum Rate: 100 |
||
| ⚫ | |||
** Track Complete properties: |
** Track Complete properties: |
||
| − | *** Requirement: > 0 |
+ | *** Requirement: > 0 (immediate Track Lost at 0) |
*** Icon Colour: Red. |
*** Icon Colour: Red. |
||
*** Adds to cleared song count in profile card. |
*** Adds to cleared song count in profile card. |
||
*** Fulfills song unlock requirements. |
*** Fulfills song unlock requirements. |
||
** Gauge Colour: Red. |
** Gauge Colour: Red. |
||
| + | |||
| − | * While under 30%, flashing red lights appear around the floor input. |
||
| + | * While Recollection Rate < 30, the bottom of the screen flashes red. |
||
| ⚫ | |||
| + | * Losing consecutive notes incurs a greater penalty. |
||
| + | * With [[Pandora Nemesis (MTA-XXX)]]: |
||
| + | ** Initial Rate: 20 |
||
| + | ** Maximum Rate: 20 |
||
| + | ** LOST Note Penalty: 1 |
||
| + | ** PURE/FAR Note Recovery: 0 |
||
| + | ** No greater penalty for losing consecutive notes. |
||
| + | |||
| ⚫ | |||
*Enabled when selecting a partner with the OVERFLOW skill effect. |
*Enabled when selecting a partner with the OVERFLOW skill effect. |
||
*Hybrid of Easy and Hard gauges: |
*Hybrid of Easy and Hard gauges: |
||
**Initially functions as an Easy gauge. |
**Initially functions as an Easy gauge. |
||
| − | **Transitions into a Hard gauge upon reaching 100 |
+ | **Transitions into a Hard gauge upon reaching 100 rate. |
| − | * |
+ | *Default properties: |
| − | ** Initial Rate: 0 |
+ | ** Initial Rate: 0 |
| + | **Maximum Rate: 100 |
||
| − | ** LOST Penalty: Same as Easy/Hard rate. |
+ | ** LOST Note Penalty: Same as Easy/Hard rate. |
** Track Complete properties: |
** Track Complete properties: |
||
*** Requirement: Same as Easy/Hard rate. |
*** Requirement: Same as Easy/Hard rate. |
||
| Line 152: | Line 169: | ||
*** Fulfills song unlock requirements. |
*** Fulfills song unlock requirements. |
||
** Gauge Colour: |
** Gauge Colour: |
||
| − | *** As Easy gauge: Cyan (< 70 |
+ | *** As Easy gauge: Cyan (< 70). Cyan & red (≥ 70). |
*** As Hard gauge: Red. |
*** As Hard gauge: Red. |
||
| − | *Songs can be cleared without the transition into Hard occurring, if the rate is kept between 70 |
+ | *Songs can be cleared without the transition into Hard occurring, if the rate is kept between 70 and 100. |
| + | |||
| + | === CHUNITHM === |
||
| + | *Enabled when selecting a partner with the CHUNITHM skill effect. |
||
| + | *Effectively a reskin of the Normal gauge. |
||
| + | *Not a single Recollection Gauge, but a set of 10 consecutive gauges. |
||
| + | *The number displayed is in square brackets. It is not the Recollection Rate, but a gauge counter. |
||
| + | **When a gauge is filled, the rate is reset to 0 and the gauge counter is incremented by 1. |
||
| + | *Default properties: |
||
| + | **Initial Gauge: [0] |
||
| + | **Maximum Gauge: [10] |
||
| + | **Initial Rate (per gauge): 0 |
||
| + | **Maximum Rate (per gauge): 10 |
||
| + | **LOST Note Penalty: 2 |
||
| + | **Track Complete properties: |
||
| + | ***Requirement: ≥ [7] |
||
| + | ***Icon Colour: Purple. |
||
| + | ***Adds to cleared song count in profile card. |
||
| + | ***Fulfills song unlock requirements. |
||
| + | **Gauge Colour: Blue (< [7]). Yellow (≥ [7]). |
||
| + | |||
| + | === DORO*C === |
||
| + | *Enabled when selecting [[DORO*C]] as partner. |
||
| + | *Recollection Rate is the highest possible score at the current time. |
||
| + | *The highest possible [[Scoring#Grades|grade]] is displayed on the Gauge. |
||
| + | *Scale is not linear. All grades have the same interval length but the score ranges for each are different. |
||
| + | *Default properties: |
||
| + | **Initial Rate: EX |
||
| + | **Maximum Rate: EX |
||
| + | **LOST Note Penalty: Depends on number of notes. |
||
| + | **FAR Note Penalty: Depends on number of notes. |
||
| + | **Track Complete properties: |
||
| + | ***Requirement: ≥ AA |
||
| + | ***Icon Colour: Green. |
||
| + | *** Does not add to cleared song count in profile card. |
||
| + | *** Fulfills song unlock requirements. |
||
| + | **Gauge Colour: Blue and red. |
||
{| class="article-table" |
{| class="article-table" |
||
| − | ! colspan="7" style="text-align:center;" |Recollection |
+ | ! colspan="7" style="text-align:center;" |Recollection Gauge Display |
|- |
|- |
||
| − | ! colspan="2" | |
+ | ! colspan="2" |Easy |
! colspan="2" |Normal |
! colspan="2" |Normal |
||
| − | ! colspan="2" | |
+ | ! colspan="2" |Overflow |
| − | ! rowspan="2" | |
+ | ! rowspan="2" |Hard |
|- |
|- |
||
| − | !Below 70 |
+ | !Below 70 |
| − | !Above 70 |
+ | !Above 70 |
| − | !Below 70 |
+ | !Below 70 |
| − | !Above 70 |
+ | !Above 70 |
| − | !Below 70 |
+ | !Below 70 |
| − | !Above 70 |
+ | !Above 70 |
|- |
|- |
||
|[[File:Recollection gague - Easy below 70.png|thumb|37x220px]] |
|[[File:Recollection gague - Easy below 70.png|thumb|37x220px]] |
||
| Line 179: | Line 232: | ||
|} |
|} |
||
| − | == |
+ | == Scoring == |
''Main article: [[Scoring]]'' |
''Main article: [[Scoring]]'' |
||
| Line 185: | Line 238: | ||
All players are able to play every song in the [[Arcaea]] pack for free. Songs in [[Memory Archive]] and song packs can be bought with [[Currency#Memories|Memories]], which are purchasable with real money. To see the cost for each song pack, access the song pack's page from [[Songs by Pack]]. |
All players are able to play every song in the [[Arcaea]] pack for free. Songs in [[Memory Archive]] and song packs can be bought with [[Currency#Memories|Memories]], which are purchasable with real money. To see the cost for each song pack, access the song pack's page from [[Songs by Pack]]. |
||
| − | Certain songs, free or paid, have locked higher difficulties. There are |
+ | Certain songs, free or paid, have locked higher difficulties. There are five ways to unlock songs: |
#Reaching milestones in [[World Mode]] maps. Songs unlocked this way are listed in the [[Songs by Pack]] page (in bold), These songs have a different background on the song list compared to other songs. |
#Reaching milestones in [[World Mode]] maps. Songs unlocked this way are listed in the [[Songs by Pack]] page (in bold), These songs have a different background on the song list compared to other songs. |
||
#Paying [[Currency#Fragments|Fragments]]. The cost varies based on the song. |
#Paying [[Currency#Fragments|Fragments]]. The cost varies based on the song. |
||
| − | #* The cost for Present charts are around 20-80 Fragments, while for the Future ones are 150-280. |
+ | #* The cost for Present charts are around 20-80 Fragments, while for the Future ones are 150-280. [[SAIKYO STRONGER]]'s Future chart requires the most Fragments (1000). |
#* [[γuarδina]] is the only song to have a Past chart that requires Fragments to unlock. |
#* [[γuarδina]] is the only song to have a Past chart that requires Fragments to unlock. |
||
#Clearing certain other songs on the same difficulty. These songs may come with rating requirements, Fragment requirements, or both as well. |
#Clearing certain other songs on the same difficulty. These songs may come with rating requirements, Fragment requirements, or both as well. |
||
| Line 194: | Line 247: | ||
#* e.g. To unlock [[Sheriruth]]'s Future difficulty, you have to clear [[Essence of Twilight]]'s Future difficulty with a grade of A or higher. |
#* e.g. To unlock [[Sheriruth]]'s Future difficulty, you have to clear [[Essence of Twilight]]'s Future difficulty with a grade of A or higher. |
||
# Completing the corresponding Anomaly. This currently only applies to [[Grievous Lady]] ([[Axium Crisis#Anomaly|Axium Crisis Anomaly]]) and [[Fracture Ray]] ([[Ether Strike#Anomaly|Ether Strike Anomaly]]). |
# Completing the corresponding Anomaly. This currently only applies to [[Grievous Lady]] ([[Axium Crisis#Anomaly|Axium Crisis Anomaly]]) and [[Fracture Ray]] ([[Ether Strike#Anomaly|Ether Strike Anomaly]]). |
||
| + | # Reaching certain [[Potential]]. This currently only applies to [[SAIKYO STRONGER]]'s Future difficulty. |
||
These requirements are generally displayed on the song selection screen. The various requirements flash by every second or so, excluding the ones already cleared. |
These requirements are generally displayed on the song selection screen. The various requirements flash by every second or so, excluding the ones already cleared. |
||
==Play Styles== |
==Play Styles== |
||
| − | There are several methods usable when playing Arcaea. An important rule to improve, however, is to remain consistent: if you wish to play with thumbs, stick with thumbs, and if you wish to use all your fingers, do it all the time. Note that, save for a few charts on Future difficulty, you only need two fingers/ thumbs to clear songs. |
+ | There are several methods usable when playing Arcaea. An important rule to improve, however, is to remain consistent: if you wish to play with thumbs, stick with thumbs, and if you wish to use all your fingers, do it all the time. Note that, save for a few charts on Future difficulty and the Present anomalies, you only need two fingers/ thumbs to clear songs. |
===Thumb Play=== |
===Thumb Play=== |
||
| Line 209: | Line 263: | ||
You can mix and match for certain situations if it makes songs easier. For example, certain floor note + sky note combos might be easier when using the thumb and index finger of one hand; close double floor notes might benefit from using your middle fingers with your index fingers. However, discretion is advised; stick mainly to your usual method of play. Note that this does not include "freestyle" methods. |
You can mix and match for certain situations if it makes songs easier. For example, certain floor note + sky note combos might be easier when using the thumb and index finger of one hand; close double floor notes might benefit from using your middle fingers with your index fingers. However, discretion is advised; stick mainly to your usual method of play. Note that this does not include "freestyle" methods. |
||
| + | |||
| ⚫ | |||
| + | ==Network== |
||
| + | |||
| + | There are several features accessible by selecting "Network" on the Main Menu. |
||
| + | |||
| + | ===Registration=== |
||
| + | In order to play online, it is first necessary to register with an email address, username and password. To log in, the latest version of the game is required. The [[Arcaea]] pack contains free songs playable without registering, but other song packs would be unavailable. Once registered, you can purchase [[Memories]] and have access to all Network features. |
||
| + | |||
| + | ===Cloud Sync=== |
||
| + | Added in 1.1.2, this function lets you upload your best scores to or download them from the Cloud, allowing you to use a common save file across multiple devices. Since 1.6.1, the button is also available on the top-left corner of the result summary screen. |
||
| + | |||
| + | It is important to note that: |
||
| + | * Only the best scores displayed on the top-left corner of the song select screen are synced. |
||
| + | * [[Fragments]] are not synced. |
||
| + | The following do not require Cloud Sync, and are saved to your account automatically: |
||
| + | * [[World Mode]] progress |
||
| + | * [[Memories]] |
||
| + | * Best scores on leaderboard |
||
| + | |||
| + | ===Friends=== |
||
| + | To add a friend, select "Add Friends", input your friend's user ID and select "Add". |
||
| + | [[File:Friends Mutual.png|thumb|93x93px]] |
||
| + | Adding a friend does not send a request for the other party to accept. However, adding them to your friends list does not automatically add you to their friends list. They would have to add you manually, and an icon with the text "Mutual" would appear if they do so. |
||
| + | |||
| + | The Friends feature allows you to: |
||
| + | * View friend-exclusive rankings on the song selection screen. |
||
| + | * View each friend's the most recently played song (with difficulty and grade). |
||
| + | * View each friend's [[Potential]]. |
||
| + | Your friends list has a capacity of ten, but you may spend [[Fragments]] to increase the limit by selecting "Extend". Also, adding a friend would fail if you: |
||
| + | * Enter an existing friend's user ID. |
||
| + | * Enter a nonexistent user ID. |
||
| + | * Enter your own user ID. |
||
| + | |||
| + | ===Profile=== |
||
| + | Added in 1.6.0, this feature provides a beautified summary which shows: |
||
| + | * Your username. |
||
| + | * The current [[Potential]]. |
||
| + | * The selected [[Partners|Partner]]. |
||
| + | * Your User ID. |
||
| + | * The total number of Cleared, Full Recalled and Pure Memoried songs in each difficulty. |
||
| + | * If you have unlocked the Partners [[Tairitsu (Grievous Lady)]] and [[Hikari (Fracture)]]. |
||
| + | The background of the profile is dependant on what Chapter in [[World Mode]] is currently selected. |
||
| + | |||
| + | By default, the total number of cleared songs for Past difficulty is shown. Selecting "PST" on the bottom-left allows you to toggle between difficulties. |
||
| + | |||
| + | When all charts of a difficulty mode (Past, Present, Future) have reached a certain grade, the following changes occur on the profile: |
||
| + | * All charts Full Recall grade or above - Full Recall text becomes purple on the respective difficulty |
||
| + | * All charts Pure Memory grade - Pure Memory text becomes blue on the respective difficulty |
||
| + | |||
| + | == Name Change == |
||
| + | Your username can be changed as follows: |
||
| + | # Access the [https://arcaea.lowiro.com/ Arcaea Official Website]. |
||
| + | # Select the "Login" button at the top and log into your account. |
||
| + | # Select the "Change" button above your username. |
||
| ⚫ | |||
Revision as of 06:25, 11 February 2020
This article describes various gameplay elements in Arcaea.
Song Selection

- There are three difficulty modes in this game:
- Past (PST): for beginners.
- Present (PRS): for all kinds of players.
- Future (FTR): for experienced or good players
- The difficulty can be selected from the icons on the upper-left.
- The song list at the right can be scrolled by sliding it up or down.
- The songs can be sorted by Title, Grade, Clear (highest to lowest submitted score), Date (when the song was added to the game), and Difficulty.
- The song pack list can be accessed by selecting the current pack at the top-middle of the screen.
- A list of songs from all packs can be accessed by entering the pack list and selecting the "All Songs" button on the bottom.
- The "RANDOM" button at the end of the song list directs to a random song without selecting it to play.
- By tapping the artwork for the song, you can set a different filter for the rankings on the lower-left, such as a filter for Friends (Only works when online).
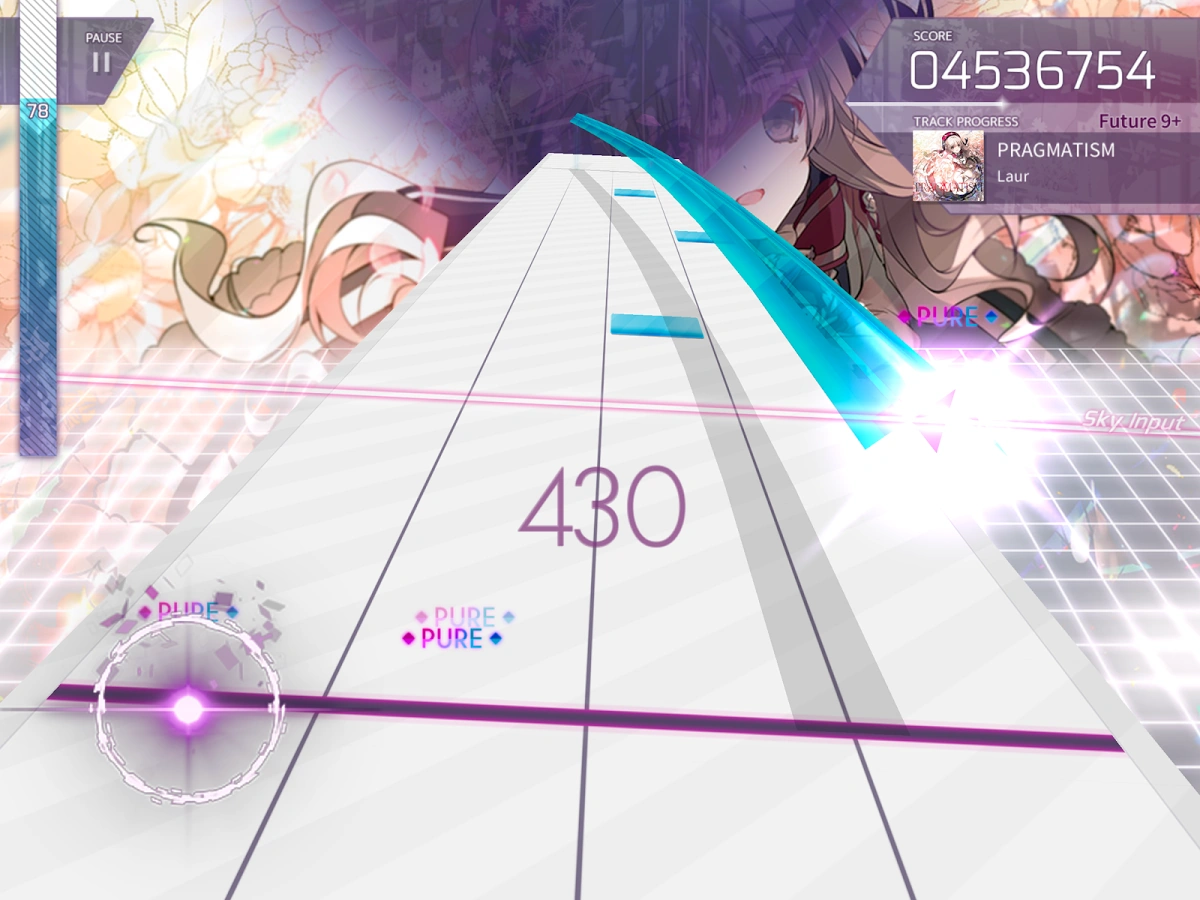
Play Screen
- Information Pane: The pane at the top-right of the screen, which displays:
- Current score
- Song progress
- Song information
- Track: The vertical plane comprising of the 4 lanes.
- Floor Input: The solid purple horizontal line, spanning the track near the bottom, is the lower bound for notes.
- Sky Input: The striped horizontal line, cutting across the middle of the screen, is the upper bound for notes.
- Combo: Found under the sky input, it shows how many notes you have hit successfully, be it Pure or Far. A miss will break the combo.
- Recollection Gauge: The vertical bar at the top-left of the screen, of which there are various types.
- FR/PM Indicators: Two adjacent dots; a purple one indicating Full Recall status and a blue one indicating Pure Memory status. These can be relocated or disabled under "Settings > Visual > FR/PM Indicator".
- Top: Indicators are displayed on the Information Pane, under the song's cover art.
- Combo: Indicators are displayed under the combo value.
- Disabled: Indicators are not displayed.
Note Types
| Name | Description | Image |
|---|---|---|
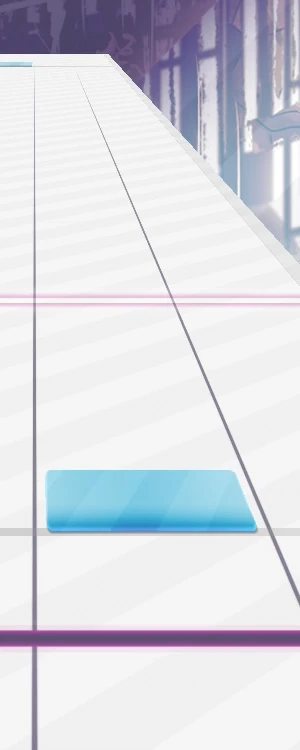
| Floor Note |
|
 |
| Long Note |
|
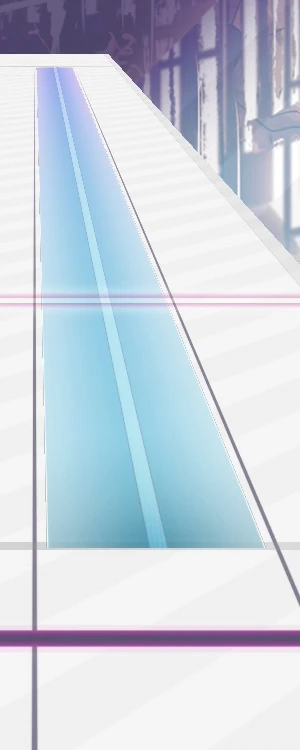  |
| Arc Note |
|
  |
| Sky Note |
|
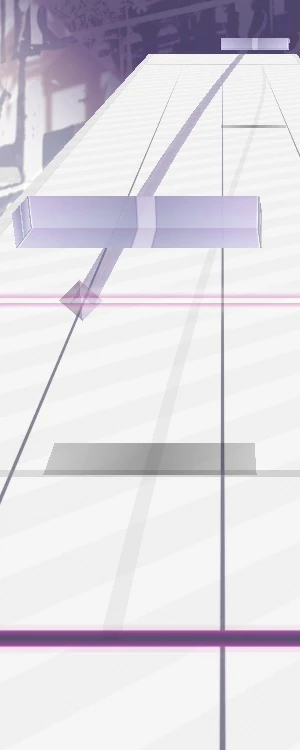  |
| Trace |
|
  |
Recollection Rate
Recollection Rate is a percentage which represents the player performance at the current time during gameplay. It is displayed on the left side of the screen on a meter known as the Recollection Gauge (or simply Gauge). The gauge fills slightly with every note hit, and depletes slightly with every note lost.
There are several different types of gauge that depend on which partner you choose that behave differently:
Normal
- The gauge enabled by default.
- Default properties:
- Initial Rate: 0
- Maximum Rate: 100
- LOST Note Penalty: 2
- Track Complete properties:
- Requirement: ≥ 70
- Icon Colour: Purple.
- Adds to cleared song count in profile card.
- Fulfills song unlock requirements.
- Gauge Colour: Purple (< 70). Purple & sky blue (≥ 70).
- Losing consecutive notes incurs a greater penalty.
- Each note hit increases the rate by a different amount, depending on the number of notes in the song chart.
- With Hikari (Zero):
- Losing a note depletes the whole gauge to 0.
- The Recollection Rate fades in and out during gameplay.
- Sealing a partner with a gauge-altering skill effect, including Hikari (Zero), reverts the gauge to a Normal one.
Easy
- Enabled when selecting a partner with the EASY skill effect.
- Default properties:
- Initial Rate: 0
- Maximum Rate: 100
- LOST Note Penalty: 1.5
- Track Complete properties:
- Requirement: ≥ 70
- Icon Colour: Green.
- Does not add to cleared song count in profile card.
- Fulfills song unlock requirements.
- Gauge Colour: Cyan (< 70). Cyan & green (≥ 70).
- The penalty for losing consecutive notes is reduced.
Hard

- Enabled when selecting a partner with the HARD skill effect.
- Default properties:
- Initial Rate: 100
- Maximum Rate: 100
- LOST Note Penalty: 8.5 (> 30). 4.5 (≤ 30).
- Track Complete properties:
- Requirement: > 0 (immediate Track Lost at 0)
- Icon Colour: Red.
- Adds to cleared song count in profile card.
- Fulfills song unlock requirements.
- Gauge Colour: Red.
- While Recollection Rate < 30, the bottom of the screen flashes red.
- Losing consecutive notes incurs a greater penalty.
- With Pandora Nemesis (MTA-XXX):
- Initial Rate: 20
- Maximum Rate: 20
- LOST Note Penalty: 1
- PURE/FAR Note Recovery: 0
- No greater penalty for losing consecutive notes.
Overflow
- Enabled when selecting a partner with the OVERFLOW skill effect.
- Hybrid of Easy and Hard gauges:
- Initially functions as an Easy gauge.
- Transitions into a Hard gauge upon reaching 100 rate.
- Default properties:
- Initial Rate: 0
- Maximum Rate: 100
- LOST Note Penalty: Same as Easy/Hard rate.
- Track Complete properties:
- Requirement: Same as Easy/Hard rate.
- Icon Colour: Green.
- Does not add to cleared song count in profile card.
- Fulfills song unlock requirements.
- Gauge Colour:
- As Easy gauge: Cyan (< 70). Cyan & red (≥ 70).
- As Hard gauge: Red.
- Songs can be cleared without the transition into Hard occurring, if the rate is kept between 70 and 100.
CHUNITHM
- Enabled when selecting a partner with the CHUNITHM skill effect.
- Effectively a reskin of the Normal gauge.
- Not a single Recollection Gauge, but a set of 10 consecutive gauges.
- The number displayed is in square brackets. It is not the Recollection Rate, but a gauge counter.
- When a gauge is filled, the rate is reset to 0 and the gauge counter is incremented by 1.
- Default properties:
- Initial Gauge: [0]
- Maximum Gauge: [10]
- Initial Rate (per gauge): 0
- Maximum Rate (per gauge): 10
- LOST Note Penalty: 2
- Track Complete properties:
- Requirement: ≥ [7]
- Icon Colour: Purple.
- Adds to cleared song count in profile card.
- Fulfills song unlock requirements.
- Gauge Colour: Blue (< [7]). Yellow (≥ [7]).
DORO*C
- Enabled when selecting DORO*C as partner.
- Recollection Rate is the highest possible score at the current time.
- The highest possible grade is displayed on the Gauge.
- Scale is not linear. All grades have the same interval length but the score ranges for each are different.
- Default properties:
- Initial Rate: EX
- Maximum Rate: EX
- LOST Note Penalty: Depends on number of notes.
- FAR Note Penalty: Depends on number of notes.
- Track Complete properties:
- Requirement: ≥ AA
- Icon Colour: Green.
- Does not add to cleared song count in profile card.
- Fulfills song unlock requirements.
- Gauge Colour: Blue and red.
| Recollection Gauge Display | ||||||
|---|---|---|---|---|---|---|
| Easy | Normal | Overflow | Hard | |||
| Below 70 | Above 70 | Below 70 | Above 70 | Below 70 | Above 70 | |
  |
  |
  |
  |
  |
  |
  |
Scoring
Main article: Scoring
Unlocks
All players are able to play every song in the Arcaea pack for free. Songs in Memory Archive and song packs can be bought with Memories, which are purchasable with real money. To see the cost for each song pack, access the song pack's page from Songs by Pack.
Certain songs, free or paid, have locked higher difficulties. There are five ways to unlock songs:
- Reaching milestones in World Mode maps. Songs unlocked this way are listed in the Songs by Pack page (in bold), These songs have a different background on the song list compared to other songs.
- Paying Fragments. The cost varies based on the song.
- The cost for Present charts are around 20-80 Fragments, while for the Future ones are 150-280. SAIKYO STRONGER's Future chart requires the most Fragments (1000).
- γuarδina is the only song to have a Past chart that requires Fragments to unlock.
- Clearing certain other songs on the same difficulty. These songs may come with rating requirements, Fragment requirements, or both as well.
- e.g. To unlock GOODTEK (Arcaea Edit)'s Present difficulty, you first need to clear Harutopia ~Utopia of Spring~ on Present.
- e.g. To unlock Sheriruth's Future difficulty, you have to clear Essence of Twilight's Future difficulty with a grade of A or higher.
- Completing the corresponding Anomaly. This currently only applies to Grievous Lady (Axium Crisis Anomaly) and Fracture Ray (Ether Strike Anomaly).
- Reaching certain Potential. This currently only applies to SAIKYO STRONGER's Future difficulty.
These requirements are generally displayed on the song selection screen. The various requirements flash by every second or so, excluding the ones already cleared.
Play Styles
There are several methods usable when playing Arcaea. An important rule to improve, however, is to remain consistent: if you wish to play with thumbs, stick with thumbs, and if you wish to use all your fingers, do it all the time. Note that, save for a few charts on Future difficulty and the Present anomalies, you only need two fingers/ thumbs to clear songs.
Thumb Play
Play with your thumbs only. Works best on smaller devices such as phones. Regarded as somewhat more difficult than using fingers. Benefits include being able to hold the device any way desired without having to place it on a proper surface.
Index Finger Play
Play with your index fingers only. Works on any device, although phones tend to slip, depending on the surface they are on. The device might need to be held steady with other fingers, but having them creep onto the screen usually causes arc notes to be LOST. Works better on heavier, less mobile devices such as tablets.
Full Hand Play
Play with anything you can, be it thumbs or fingers. Harder to learn, but makes certain difficult patterns easier. Typically less accurate than only using index fingers. Mainly adds middle fingers for a total of 4 fingers.
You can mix and match for certain situations if it makes songs easier. For example, certain floor note + sky note combos might be easier when using the thumb and index finger of one hand; close double floor notes might benefit from using your middle fingers with your index fingers. However, discretion is advised; stick mainly to your usual method of play. Note that this does not include "freestyle" methods.
Network
There are several features accessible by selecting "Network" on the Main Menu.
Registration
In order to play online, it is first necessary to register with an email address, username and password. To log in, the latest version of the game is required. The Arcaea pack contains free songs playable without registering, but other song packs would be unavailable. Once registered, you can purchase Memories and have access to all Network features.
Cloud Sync
Added in 1.1.2, this function lets you upload your best scores to or download them from the Cloud, allowing you to use a common save file across multiple devices. Since 1.6.1, the button is also available on the top-left corner of the result summary screen.
It is important to note that:
- Only the best scores displayed on the top-left corner of the song select screen are synced.
- Fragments are not synced.
The following do not require Cloud Sync, and are saved to your account automatically:
- World Mode progress
- Memories
- Best scores on leaderboard
Friends
To add a friend, select "Add Friends", input your friend's user ID and select "Add".

Adding a friend does not send a request for the other party to accept. However, adding them to your friends list does not automatically add you to their friends list. They would have to add you manually, and an icon with the text "Mutual" would appear if they do so.
The Friends feature allows you to:
- View friend-exclusive rankings on the song selection screen.
- View each friend's the most recently played song (with difficulty and grade).
- View each friend's Potential.
Your friends list has a capacity of ten, but you may spend Fragments to increase the limit by selecting "Extend". Also, adding a friend would fail if you:
- Enter an existing friend's user ID.
- Enter a nonexistent user ID.
- Enter your own user ID.
Profile
Added in 1.6.0, this feature provides a beautified summary which shows:
- Your username.
- The current Potential.
- The selected Partner.
- Your User ID.
- The total number of Cleared, Full Recalled and Pure Memoried songs in each difficulty.
- If you have unlocked the Partners Tairitsu (Grievous Lady) and Hikari (Fracture).
The background of the profile is dependant on what Chapter in World Mode is currently selected.
By default, the total number of cleared songs for Past difficulty is shown. Selecting "PST" on the bottom-left allows you to toggle between difficulties.
When all charts of a difficulty mode (Past, Present, Future) have reached a certain grade, the following changes occur on the profile:
- All charts Full Recall grade or above - Full Recall text becomes purple on the respective difficulty
- All charts Pure Memory grade - Pure Memory text becomes blue on the respective difficulty
Name Change
Your username can be changed as follows:
- Access the Arcaea Official Website.
- Select the "Login" button at the top and log into your account.
- Select the "Change" button above your username.
This costs 100 Memories per change.